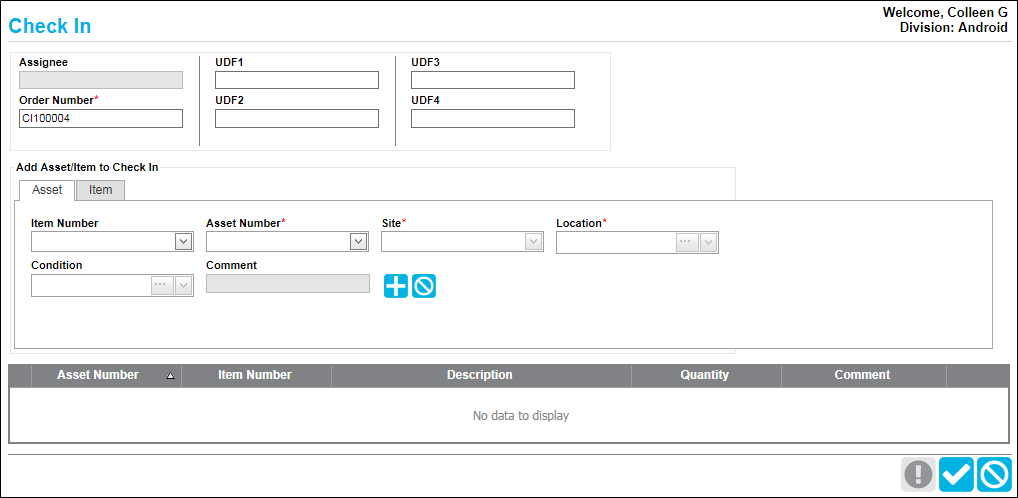
Check In Page
Assets that are checked out to an assignee are checked back into the system at the Check In page. Along with an asset or assets being checked into IntelliTrack, a consumable item or items may also be returned.
Note: In order to reach the Check In page, the RoleThe role is a collection of system features. Each feature has an access level of either read-only or edit. A role is assigned to a user. The user has access to the features found in the role. of the Logged-in UserAn IntelliTrack user has an account with IntelliTrack and uses the software; is active in the system; has a valid username and password; is assigned to at least one division and one site; has a default division and a default site. The user is designated as either an Administrative User or a Standard User. must include the Check In featureThis feature is available in edit mode. It provides for asset check-in to a default location via the web application and the mobile application. Access to this feature activates the Assets > Check In option and the Check In page in the web application and the Assets > Check In option in the mobile application..
When an asset is checked back into IntelliTrack, a Check In transaction is performed: responsibility for the asset is removed from the assignee and the asset is automatically added back into asset inventory. The asset is placed in its default location; however, this location may be changed at check-in.
When an item is returned during an asset check in, the item is automatically added back into inventory, into the site-location-quantity placed in the order and a Check In Return (CKIRT) transaction is recorded in application history.
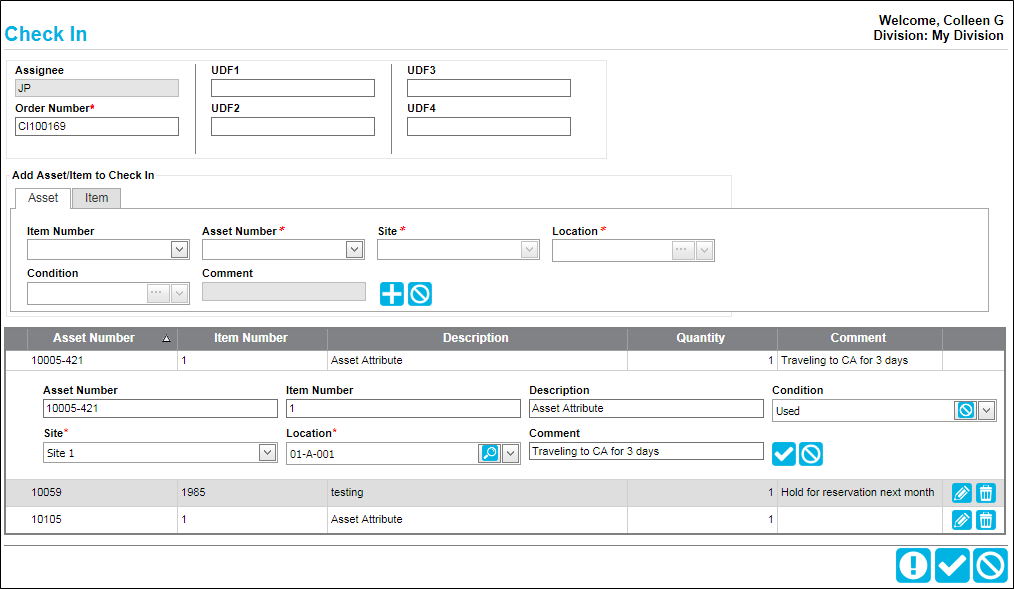
Select Assets > Check In to reach the Check In page. At the Check In page, an asset is checked back into IntelliTrack. The asset is automatically placed back into asset inventory in its default location; however, this location may be changed. Along with an item or items being checked back into IntelliTrack, a consumable item or items may be returned to inventory, per the site-location-quantity specified in the order.
- Order Number (required): a Check In Order Number is required.
- If the division is set for Check In Order auto-numbering, the order number is automatically placed in this field.
- If the division is not set for Check In Order auto-numbering, enter an order number in this field.
- Add Asset/Item to Check In\Asset tab portion of the page: in this portion of the page, select the asset or assets being checked into IntelliTrack. The asset will be placed into its default location.
- Item Number field (optional): to sort the asset by item number, click the drop-down arrow in this field and select the item from the list that appears.
- Asset Number field (required): click the drop-down arrow in this field; the assets contained in asset inventory appear in the drop-down list. Select the asset that you want to check out to this assignee.
- Site field: when the asset number is selected, this field is automatically populated based on the asset's default location. The site in which the asset resides is placed in this field. You may change the site if you want to place the asset in another site.
- Location field: when the asset number is selected, this field is automatically populated based on the asset's default location. The location in which the asset resides is placed in this field. You may change the location if you want to place the asset in another location.
Note: If your system uses containers, the Location field will contain a container control, which supports asset check in to an existing container, see "Container Control".
- Condition: if the asset condition is found in the Asset form\Warranty tab, this condition is automatically entered in this field. You may change this entry by clicking the drop-down arrow in this field and selecting another condition from the list that appears. (The condition list is pulled from the list of Condition lookups.)
- Comment: if the asset contains a comment, it is displayed in this field. If you want to update the comment for the asset, enter the changes in this field.
- Click the Add icon to add this asset to the Check In order.
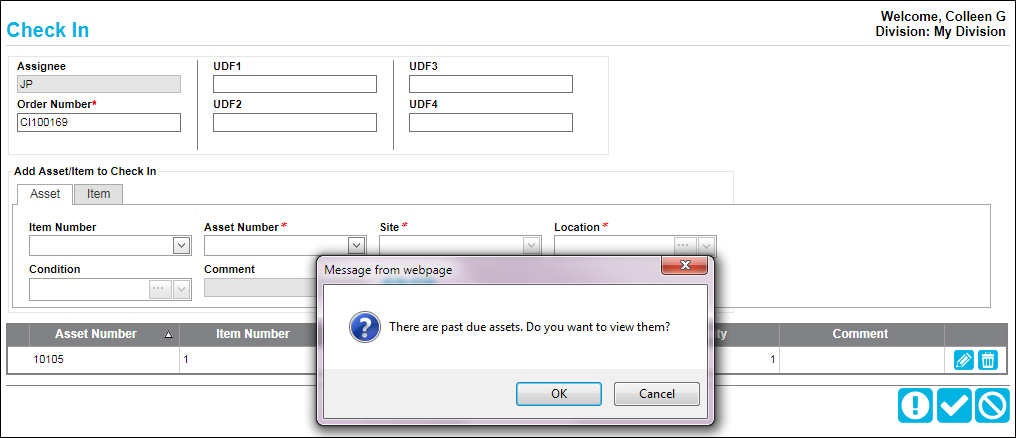
- When you add this asset to the Check In order, the Check Out assignee is entered in the Assignee field.
- If this assignee contains past due assets, a dialog appears: There are past due assets. Do you want to view them?

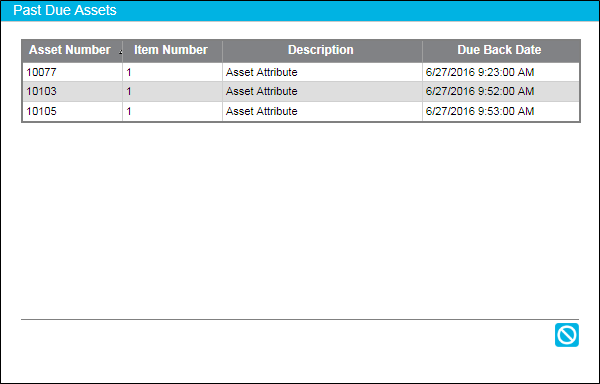
- If you want to view the assets, click OK to close the dialog and view the Past Due Assets form. It lists all past due assets for this assignee. (If you do not want to view the past due assets, click Cancel to close the dialog and return to the Check In page.)

 The Past Due icon along the bottom of the page is activated if this assignee contains past due assets, and you may click this button to view the Past Due Assets form, which displays the assets checked out past their due back date for this assignee.
- Repeat Step 2, until you have added all the assets for check in to this Check In Order.
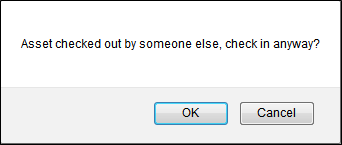
- If another asset is added that is checked out by someone else, the system warns you of this with the following dialog. To add this asset to the check in order, click OK. The dialog closes and the asset is added to the order. If you do not want to add this asset to the check in order, click the Cancel button to close the dialog and cancel adding the asset.
- The Header portion of the page contains the following UDF fields:
- UDF 1 (optional): enter customized information about Check In order in this field. This field accepts alphanumeric data.
- UDF 2 (optional): enter customized information about Check In order in this field. This field accepts alphanumeric data.
- UDF 3 (optional): enter customized information about Check In order in this field. This field accepts alphanumeric data.
- UDF 4 (optional): enter customized information about Check In order in this field. This field accepts alphanumeric data.
- When an asset has been added to the Check In order, the asset check in information may be edited or deleted from the order. To delete the asset from the order, click the
 Delete icon to the right of the asset. To edit the asset's check in information, click the
  Edit icon to place the asset information into Edit mode. The asset's condition, site-location, and comment may be edited. To save any changes to this information, click the
  Save icon. To cancel any changes, click the
  Cancel icon.
Check In Return
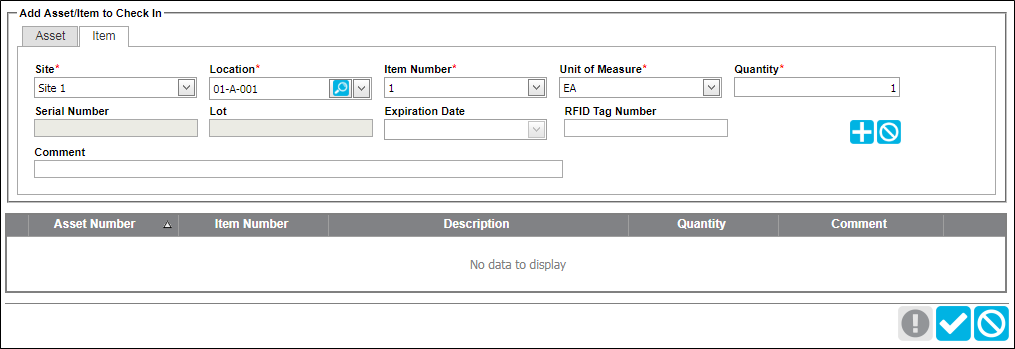
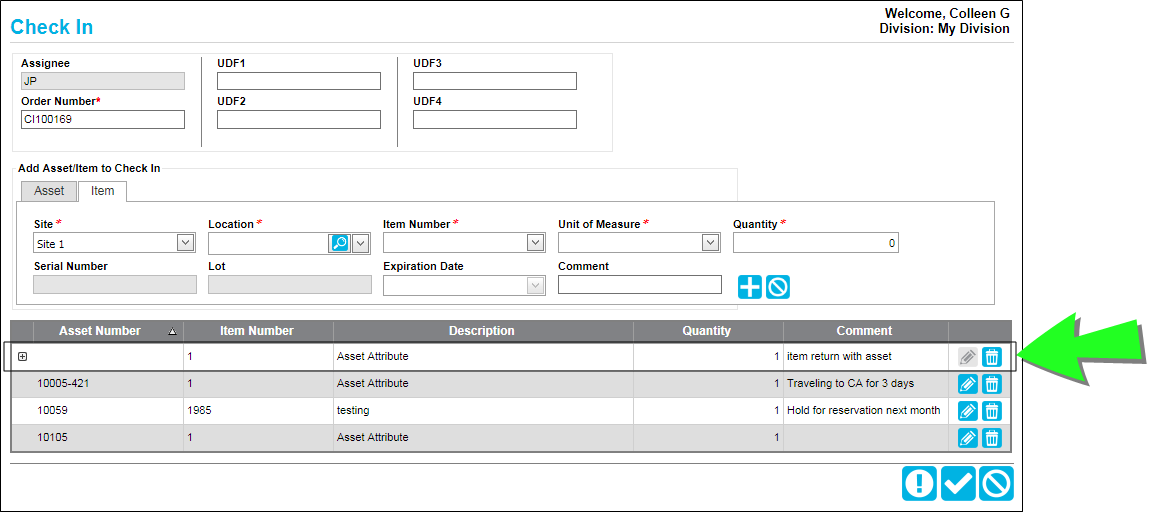
- To return a consumable item with this Check In order (optional), select the Item tab in the Add Asset/Item to Check In portion of the form. An item is returned in the Check In order from this tab.
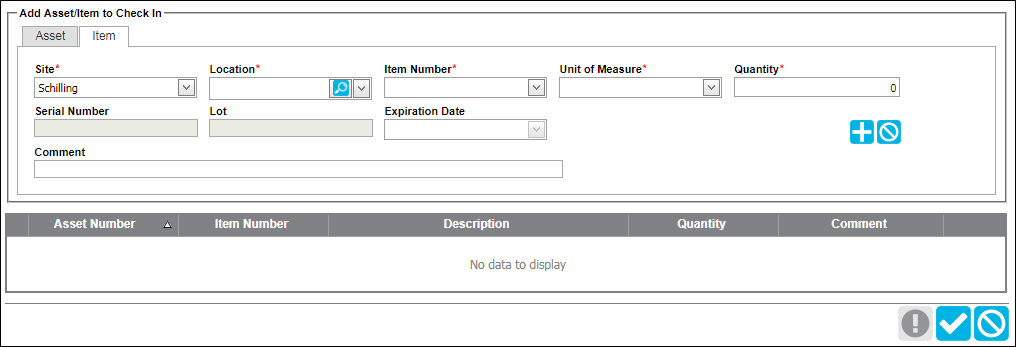
- Click the drop-down arrow in the Item Number field and select the item that is being returned.
- Site: the default site of the logged-in user is automatically entered in this field.
- Location: click the drop-down arrow and select the location to which this item is being returned.
- Unit of Measure: click the drop-down arrow in this field and select the unit of measure for the item that is being returned.
- Quantity: enter the quantity of the item that is being returned.
- Serial Number: if the item being returned is a serialized item, enter the serial number of the item being returned.
- Lot: if the item being returned is a lot item, enter the lot of the item being returned.
- Expiration Date: if the item being returned is an expiration date item, enter the expiration date of the item being returned.
- Unit Cost (required for a Track Cost item): If Track Cost is ON for this item, the unit cost is required. Enter the unit cost for the item in this field.
- RFID Tag Number (if applicable): if the item being returned is an RFID item, the RFID Tag Number field appears here. Enter the RFID tag number in this field, if applicable. When an RFID tag umber is entered, the return quantity cannot be greater than one (1).
- Comment: enter an item comment in this field, if desired.
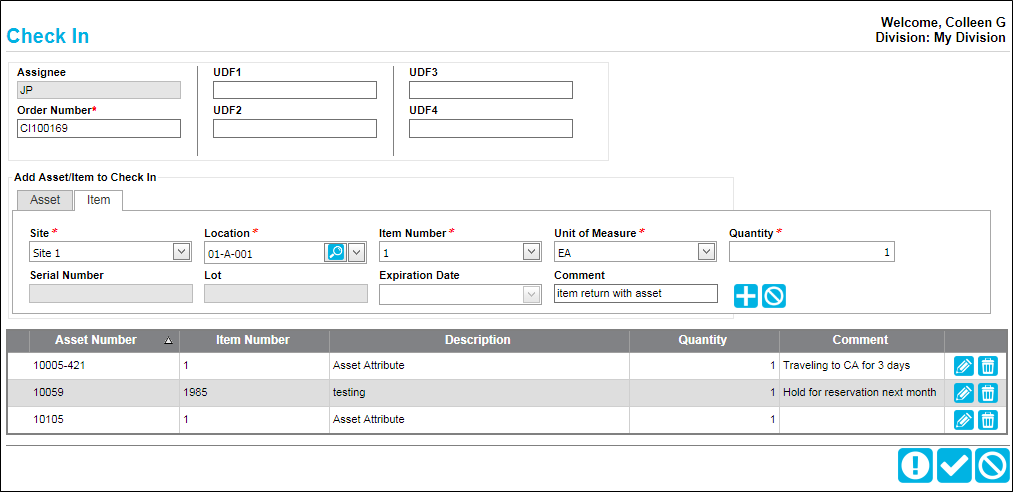
- Click the Add
 icon to add this item return to the Item tab.
- If another item is being returned, repeat steps 8-17 to add another item to the order.
Note: When adding the same location-item number-unit of measure to the Item tab more than once, a single line item is created.
Important: When the same location-item number-unit of measure is added to the order for a Track Cost item, the first Unit Cost entered is the unit cost associated with this line item if varying unit cost values are entered.
Saving the Order
When you are ready to check in the assets and, if applicable, return any consumable item or items in the order, click the  Save icon. (If you want to cancel checking in the assets, click the
  Cancel icon.)
When an asset is checked into the system, it is available again for check out to an assignee; see "Check Out Page" for more information.
When an asset is checked into the system, a maintenance order or a calibration order may be performed for it; see "Maintenance and Calibration" for more information.
When an asset is checked into the system it may be reserved to an assignee; see "Asset Reservation" for more information.